Search This Blog

Monday, January 30, 2012

Make-up Tools Holder

Make-up Tools Holder

The make-up industry keeps coming up with different brushes and tools to apply make-up.  If you’ve acquired as many tools as I have to put on make-up, you know how annoying it can be to pull out just the right one in a jumbled bag.  My exasperation became my inspiration for a roll-up holder for brushes, pencils, and lipstick.  My design travels well and washes easily.  I never leave a tool behind anymore.


Materials:


 2 pieces of cotton fabric – 10 x 17 inches – they can be the same color or complementary
  • thread
  • Elastic hair band
  • scissors


Sew the fabric, right sides together and leave one small opening to turn the fabric right side out.  Clip the corners, and turn right-side out. (I opted to embroider my initials on the outside fabric.  I did this before stitching the front and back together.)


Baste the opening closed and press the rectangle, making sure the sides and corners are pulled out.  Topstitch around the rectangle if desired.

Fold up the bottom end, wrong sides together, to make a 4 inch pocket.

Stitch along the sides through all fabrics.


This is where you have to decide on your own how wide to make each section based on the tools you have in your make-up bag.  Two of my sections are 2 inches wide.  Two others are just under an inch, and the last two are each about 1 ½ inches wide.  Mark the stitching lines and sewing from the top of the pocket to the bottom fold.


To use, place your brushes and tools in the sections, fold the top section down to cover your tools, and roll it up.  An elastic hair band, the kind that are usually wrapped, make a great closure.


Thursday, January 26, 2012

Summer Backpack


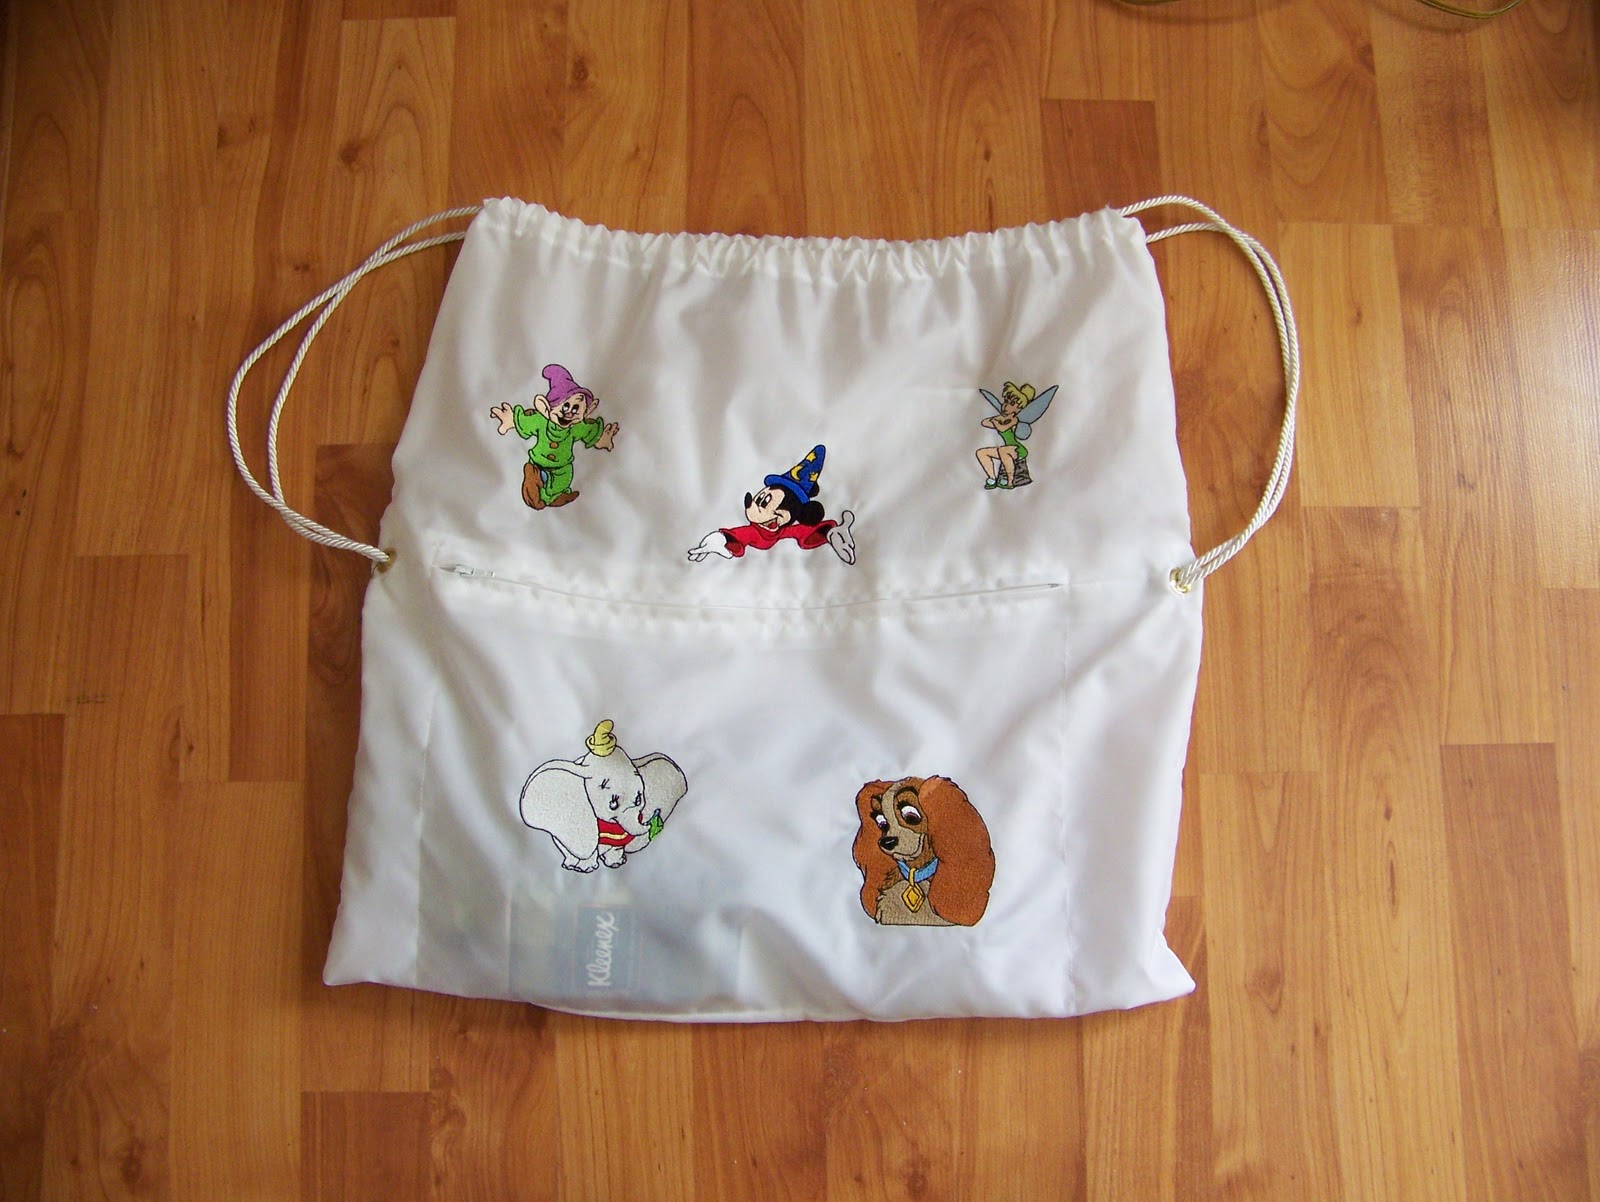
If you've ever carried a dark-colored purse in the Summer, you know that dark colors absorb heat. With this in mind, I went looking for a white backpack to use at theme parks.  No such animal existed, so I made my own.  Last Spring I made my first bag.  It was a success till the string broke two weeks ago.  Since it also had an ink stain from a leaking pen, I opted to make a new backpack, but this time, I added a pocket on the inside for smaller items that tend to get lost once several items are placed in the main section of the backpack.  Use my directions to make your own.  The designs were embroidered using a Brother embroidery machine, but you can use your imagination to make your bag "yours".


Materials:
  • 1 yd of sport nylon (it's more than enough for 1 bag, but not quite large enough for 2)
  •  12 inch nylon zipper
  • thread
  • 3 1/2 yards of 1/16 in. twist cord
  • 2 sets of large eyelets
Optional
  • 1 inch square of leather or non-raveling         ribbon or fabric
  • small scraps of interfacing or stabilizer


DIRECTIONS:

Cut two pieces of sport nylon  1 - 20 long  x 18 wide  and 1- 18x18


Inserting the Zipper:
Fold the 20 x 18 piece in half and stitch 1 inch seam along the fold across the fabric.  Smaller stitches can be used at the beginning of the seam for about 2 inches, longer stitches in the middle, and smaller at the end.  This seam will eventually be cut open for the zipper, so if the stitches are not so tight, it will be easier to open the seam.  The ends of the seam will not be opened, so they can be tighter.


Cut along the fold and lay the seam flat.

Lay the zipper, face down, and center it along the seam.


Using a zipper foot, stitch the zipper in place.  My actual bag did have better stitching around the zipper.


Using a seam ripper, carefully open the seam JUST over the front of the zipper.


I'm right handed, so I prefer to have the zipper open from right to left.  Turn the top in the direction in which you want to open the zipper and mark it with a sticky dot, or if you intend to decorate the front, now would be a good time to do so.


Forming the Outside Zipper Pocket:
Measure the distance from the raw edge of the seam to the bottom of the bag.  It should be about 9 inches, but it's better to measure, than just cut the fabric for the zipper pocket.  The width of this piece will be the same as the bag; 18 inches.  In the photo, you can see, my zipper pocket piece ended up much closer to 10 inches.


Lay top of the zipper seam even with the rectangle you just cut.  Stitch along the top, catching the zipper, one layer of the outside fabric, and pocket fabric, about 1/4 inch.  Stitch again using a zig-zag stitch or overcast stitch.  Sport nylon ravels if you look at it, so overcasting the seams will extend the life of your backpack.  Better yet, if you have a serger, stitch along all the edges before you assemble.


Stitch along the sides and bottom to close the pocket.  I added a side seam from the edge of the zipper to the bottom.  I wanted to make it impossible for small items to move to the far corners of the pocket.


Use a piece of sport nylon to make a pocket for the inside.  My wallet is more rectangular than square, so I cut it about 7.5 inches long by 5.5 inches deep.  Hem the pocket on all three sides and use a narrow hem foot finish the top.  If you don't have a narrow hem foot, just fold over the edge twice and stitch the fold.  Basically, you want a finished edge.


Place the inside pocket piece just slightly below the center on the backpack back piece (18x18), and stitch along the bottom of the pocket.  Move the sides of the pocket in about 1/4 inch so that the pocket gaps a bit. Stitch down each side.  The gap makes it easier to place something in the pocket and prevents the back from being pulled out of shape.  Now stitch along the three sides again, but this time, make sure you are just to the left of the raw edge which you may just see through the pocket.  This encases the raw edge and gives a bit more strength to the pocket.

Notice that the sides do not form a 90 degree angle.  They angle in just a tad to give the pocket a gap.


Assembling the bag:
Place the right sides of the front and back together.  Trim the bottom edges so they are even. Stitch 1/2 inch seams along the sides and bottom.  Serge or overcast the seams.


Serge or overcast the raw edge of the top of the bag.


Making the cord openings:
Measure down from the raw edge of the bag 1 1/2 inches.  Sew large button holes (an inch or so), parallel to the raw edge, on either side of each side seam.   The buttonholes will be the opening through which the cords will enter and exit the casing.


Making the cord casing:
With the bag right-side out, fold the top to the inside 1 inch.  The buttonholes will be showing on the outside of the bag.  Stitch along the raw edge.


Fold the nylon cord in half, and wrap the cord with clear tape.  The tape keeps the cord from fraying while putting it through the casing.  Cut the cord in half over the tape.


Thread the cord through the casing, starting at one end and ending up at the buttonhole next to where you started. A bodkin is handy for this, but a safety pin will do.  Thread the second piece of cording the same way, but start at the opposite side of the backpack.


Fold a 2 inch piece of  of interfacing or stabilizer and place it inside the bag,  between the front and back of the bag near the zipper.  Make a large buttonhole through all layers of the bag near the outside edge.  It will need to be large enough to fit the center of the eyelet.  Using the tools suggested on the package, attach the eyelets to the bag.  You could skip the button hole, but I thought this would keep the eyelet from tearing through.


Thread the cords through the eyelets.  Adjust the length of the cords for comfort.  You can tie a large knot at the end of the cord, or fold a piece of leather, or other fabric that won't ravel, over the cords and stitch across the cords several times.

Tuesday, January 17, 2012

Nook Cover Project


I designed a nook cover that I really like.  The cover opens like a stenographer notebook and acts as a support while in use.  Here are the basic directions to make your own.  This design can be used for other electronic readers, but my measurements are for the Nook.
The nook is 5”x 7 6/8”. Basically I wanted to make my cover larger on three sides to protect it and have enough room to store a flashlight or clip on a flashlight.  My finished cover 6 1/2 by 8 ½.
You will need:

·         Three pieces of sturdy fabric like a no-wale corduroy
            Denim is a  bit too smooth to allow for a good grip while holding the nook.
1 -  14”  wide  x 19 ½” long                                                                                                                                 
1 -  4 ½” wide x 5” long.
            1 - 6” x 9”  can be complementary or matching fabric. Fabric with a nap helps hold your                                  device in place
·         3 pieces of very stiff cardboard (not corrugated)
                                2 -  63/8” x  8 ½ “
        1 - 63/8 x 1”.
·         A piece of lighter-weight cardboard…like a cereal box – 5” x 7 6/8”; the same size as the nook
·         16 inches of 1 inch wide elastic – cut into 4 pieces – 4 inches long.
·         Glue gun
·         Sewing machine
·         Duck tape
·         Large snap
·         Masking tape and marker
·         Sewing needle, scissors, and thread


Design Placement
I happen to have an embroidery machine, so I decorated my fabric before I started putting it together.  If you plan to decorate the outside or inside, make sure you note which section is front, back and inside/back.   After all, this cover folds out so that the inside cover can be viewed.  Hint: If you’re fabric is very plain and you want to add some pizzazz,  use a colorful ribbon and stitch it onto the front of the cover before stitching the rectangle together or glue the ribbon in place after the cover is done.  By making the ribbon longer than the cover, you can use the ribbon as a closure instead of making the tab.

To make the tab closure, fold the smaller piece of fabric into a rectangle and sew the longer sides together.  Move the seam to the center, and then stitch one end.  Turn right side out.

Fold the sturdy fabric, in half, right sides, together to form a rectangle 7” by 19”.  Find the center of the top of the rectangle, and place the tab between the two layers, raw edges even, and the seam on the tab facing the back.  If you’re unsure if it’s facing the right way, pin in place and fold out the fabric to see if it’s where you want it.  Sew a seam long the top and the side ¼ inch wide.  Leave the bottom open.  Turn the rectangle right side out.

Sew ½ of the snap to the front of the cover, about 2 ½ inches from the opening and centered on the cover.  Do this BEFORE inserting the cardboard support.

Use duct tape to assemble the very stiff cardboard into along rectangle.  The 1 inch piece will act as a spine so that there is space for the nook inside the holder.  The duct tape acts as a hinge connecting the front and back.   Duct tape can be used to re-enforce the bottom edges of both the top and bottom since the cover is going to be resting on either you or a table and you don’t want the edges to bend over.


Slip the cardboard into the rectangle.  If you find it’s a bit loose, remove the cardboard, turn the rectangle inside out, and re-sew the side seam, taking a little deeper seam.  It should be tight enough to prevent the fabric from moving, but loose enough for the cardboard support to be slipped inside without a huge struggle.


Fold the open edge in, and use a blind stitch to close the bottom of the cover or glue it shut.


To begin assembling your cover, fold the complementary fabric around the lighter-weight cardboard.  Fold in the corners first and use hot glue to hold it in place.  Fold the four sides over and glue them in place.   This will be a platform to which the nook will be attached with elastic.


Mark the platform for placing the elastic and use the glue gun to secure the elastic in place .  The device can be used for seeing where to place the elastic, but remove it before you begin to glue.  You don’t need to allow for space for the device under the elastic.  The flatter the elastic lies across the front of the platform, the firmer it will hold the device.


Place the platform on top of the inside back cover and decide if you want it centered or slightly to one side.  If you expect to store a clamp on light or flashlight, moving it to one side or the other will give you more room to store it.  Glue the platform in place.  Glue a small piece of elastic to the side of the platform to hold the flashlight.


Mark where the snap hits the tab when the device is inside, and add the other half of the snap to the tab.


·